
Desserts
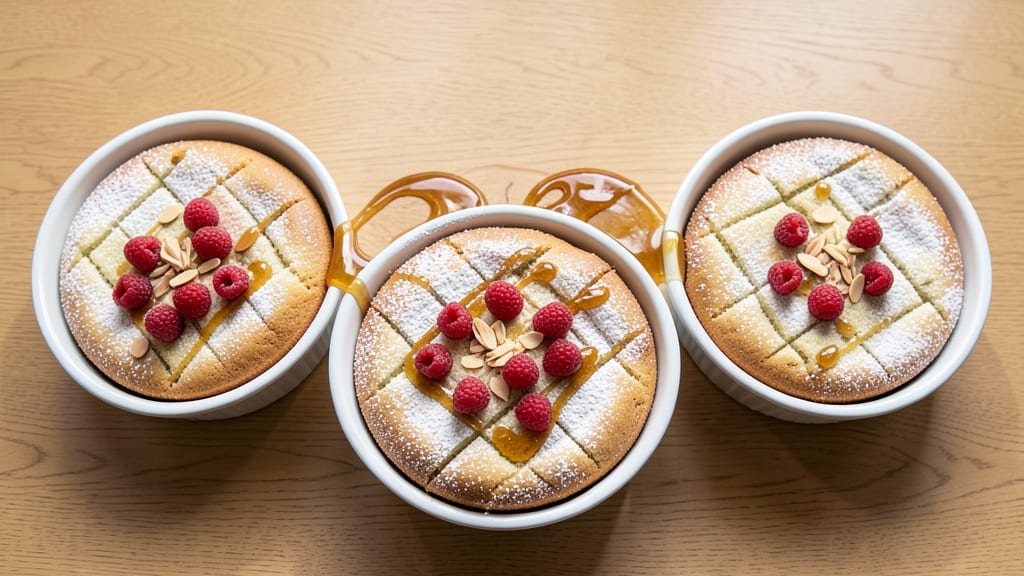
Transforming a simple vanilla sponge into a colorful alphabet cake is easier than you think—and it’s the perfect way to make a child’s birthday unforgettable. This recipe combines a moist, tender cake base with vibrant edible letters that kids can’t resist.
The secret lies in a foolproof vanilla sponge that bakes evenly, ensuring every slice is as delicious as it looks.
We’ll guide you through baking a sturdy cake layer, then cover it with smooth fondant or marzipan for a clean canvas. Using pre-made edible letters saves time, but you can also cut your own from fondant for a personalized touch.
The key is pressing the letters firmly into the icing so they stay in place—no wobbly letters here!
Once assembled, your cake will feature bright, crisp letters that pop against the creamy frosting, plus optional fillings like jam or whipped cream for extra flavor. This isn’t just a cake—it’s a keepsake that sparks joy with every bite. Let’s make one that becomes the star of the party.
The best part? This method works for any occasion—birthdays, learning milestones, or just because. With just a few tools and a little patience, you’ll create a showstopper that’s as fun to make as it is to eat. Ready to get started?
Ingredients for alphabet cake
A fluffy vanilla sponge meets colorful letters for a birthday showstopper.
| Ingredient | Amount | Notes |
|---|---|---|
| All-Purpose Flour 🌾 | 3 cups | Sifted for light texture |
| Granulated Sugar 🍚 | 2 cups | White or light brown |
| Unsalted Butter 🧈 | 1 cup | Room temperature, full-fat |
| Large Eggs 🥚 | 4 whole | Room temperature for even mixing |
| Vanilla Extract 🌿 | 2 tsp | Pure, high-quality extract |
| Baking Powder 🧂 | 2 tsp | Aluminum-free preferred |
| Salt 🧂 | ½ tsp | Fine sea salt |
| Whole Milk 🥛 | 1 ½ cups | Room temperature |
| White Fondant 🎂 | 2 lbs | Store-bought or homemade |
| Edible Letter Decorations 🔤 | 1 package | Assorted colors, 12 letters |
| Buttercream Frosting 🍰 | 4 cups | Homemade or store-bought |
| Jam or Preserves 🍓 | ½ cup | Optional filling, strawberry or raspberry |
| Whipped Cream 🍦 | 2 cups | Optional filling, homemade or store-bought |
| Food Coloring 🎨 | 1 package | Gel-based for vibrant colors |
| Parchment Paper 📄 | 1 sheet | For cake layer support |
The all-purpose flour and baking powder combo ensures your cake bakes up light and sturdy—perfect for holding those letters. King Arthur or Gold Medal flours are my go-tos for extra tenderness. Butter should be room temperature (about 68°F), so take it out 30 minutes before mixing. For the fondant, Wilton or homemade rolled out smooth is ideal—no lumps! If you're making your own, add a pinch of shortening to keep it pliable. The edible letters? Wilton or Sugarflair brands are kid-tested and party-approved.
No vanilla extract? Vanilla bean paste works in a pinch, or scrape seeds from a pod. For the frosting, homemade buttercream (butter + powdered sugar + milk) beats store-bought every time—just add a splash of milk to thin if needed. Short on jam? Applesauce or Nutella add sweetness without altering the cake structure. The whipped cream filling? Cool it before adding to prevent melting. And if you're feeling fancy, tint the frosting with gel food coloring for a cohesive look—just a few drops goes a long way.
Store cake layers wrapped in plastic at room temp for 2 days or freeze for 1 month. Fondant letters stay crisp when stored in an airtight container with parchment between layers. Assemble the cake within 4 hours of baking for the best texture. Pro tip: Chill the cake 30 minutes before adding letters so the frosting sets slightly—prevents wobbly letters! Leftovers? Slice and store in the fridge for 3 days—trust me, they’ll disappear fast.
Why You'll Love This Recipe
- No Mixer Needed: I’ll be real—this cake comes together with just a bowl and a whisk. Cream the butter and sugar until light, crack in those eggs one at a time, and fold in the flour. No stand mixer, no fuss, just good old elbow grease. (Yes, even on a Tuesday night.)
- Vanilla-Kissed Magic: That little splash of vanilla extract? It’s the secret weapon. The butter and sugar create a rich base, but the vanilla ties it all together—warm, sweet, and just a little nostalgic. It’s the kind of flavor that makes you go back for seconds without even thinking.
- Party in a Box: This cake is my go-to for birthdays, showers, or just because. Cut it into squares, stack them with frosting, or serve it plain—it’s always a hit. Honestly, the only limit is how creative you want to get with the toppings.
- Budget-Friendly Staples: You’re already stocked. Flour, sugar, butter, eggs, and vanilla? That’s it. No specialty ingredients, no pricey shortcuts. It’s the kind of recipe that stretches your dollar while still feeling special—leftovers? Even better.
Step-by-step instructions for alphabet cake
Let's bring this colorful cake to life with precise layers and creative decorating.
Bake the Cake Layers
Preheat your oven to 350°F and grease three 8-inch round cake pans with the 1 cup unsalted butter, then line the bottoms with the 1 sheet parchment paper. In a large mixing bowl, combine the 3 cups all-purpose flour, 2 cups granulated sugar, 2 tsp baking powder, and 0.5 tsp salt. Whisk until evenly distributed.
In a separate bowl, beat the 4 whole large eggs and 1.5 cups whole milk until smooth, then gradually mix in the 1 cup unsalted butter and 2 tsp vanilla extract. Slowly incorporate the wet ingredients into the dry mixture, mixing just until combined—don't overmix. Divide the batter evenly among the prepared pans.
Bake for 25-30 minutes or until a toothpick inserted into the center comes out clean. Let the layers cool in the pans for 10 minutes, then transfer to a wire rack to cool completely. This cooling step ensures clean slicing later.
Assemble the Cake Layers
Once fully cooled, place the first cake layer on a cake stand or plate. Spread ½ cup buttercream frosting evenly over the top, leaving a ½-inch border uncovered. Repeat with the second layer, then place the third layer on top. Frost the entire cake with the remaining 3½ cups buttercream frosting, creating a smooth, even surface.
For added flavor, you can fill the cake with 0.5 cup jam or preserves or 2 cups whipped cream between layers. This step is optional but adds a delightful surprise with every bite. Chill the assembled cake in the refrigerator for 30 minutes to set the frosting before decorating.
Decorate with Fondant Letters
Roll out 1 lb of the 2 lbs white fondant on a clean surface dusted with powdered sugar to prevent sticking. Using a letter cutter or knife, cut out letters to spell out a name or message. Repeat with the remaining 1 lb fondant to create additional letters or shapes.
Color the fondant letters using the food coloring if desired. Apply a thin layer of buttercream frosting to the cake as an adhesive, then press the fondant letters gently into place. For extra stability, use the edible letter decorations from the package to spell out words or phrases directly on the cake.
Let the fondant decorations set for 15-20 minutes before serving. This ensures they stay in place and look perfect for photos. The combination of handmade fondant letters and store-bought decorations creates a visually stunning cake that kids will love!
Pro Tips For Making Alphabet Cake
- Weigh Your Butter: I learned this the hard way—measuring butter by scooping it straight from the fridge gives you inconsistent results. Use a kitchen scale for 227g (1 cup) of softened butter, and let it sit at room temp for 30-45 minutes until it’s smooth but not greasy. That’s the sweet spot for even mixing.
- Mix Dry Ingredients First: Skip the urge to toss everything in the bowl at once. Whisk flour, sugar, and baking powder together first—this prevents lumps and ensures your cake doesn’t turn out dense. I was skeptical until I tried it; the texture is noticeably lighter.
- Don’t Overmix the Batter: Once you add the wet ingredients, mix just until combined. Overmixing activates the gluten in the flour, which leads to a tough, chewy cake. Stop when there are no more streaks of flour—about 20-25 strokes with a spatula is plenty.
- Use Room-Temp Eggs: Cold eggs can cause pockets of air to form in your batter, leading to a cake that rises unevenly. Let your eggs sit out for 30 minutes before cracking them into the mix. This small step makes a real difference in how evenly your cake bakes.
Wine and beer pairings for this dish
Sweet Dessert Wines
For an alphabet cake with jam or fruit fillings, a Moscato d'Asti or Riesling is my go-to. These wines have a natural sweetness that complements the fruity notes of strawberry or raspberry jam while balancing the cake’s richness.
Serve chilled—around 45-50°F—to enhance the refreshing contrast. A glass of Brachetto d'Acqui adds a fizzy, berry-forward sparkle that kids (and adults!) will adore. 🍷
Creamy Beer Pairings
A Belgian Witbier like Hoegaarden or Stella Artois brings a crisp, slightly spiced profile that cuts through the buttercream’s sweetness. The citrusy notes from coriander and orange peel in these beers pair beautifully with vanilla and berry fillings.
For a richer option, try a Belgian Dubbel—its caramel and chocolate undertones mirror the depth of the cake’s frosting. Serve both at 40-45°F for the best experience.
Coffee or Tea Pairings
If you’re serving the cake after dinner, a strong espresso or chocolate mocha enhances the vanilla and fruit flavors without overpowering them. For a lighter option, a chamomile or lavender tea with a hint of honey adds a soothing contrast to the cake’s richness.
I love pairing it with a vanilla latte—the creamy foam mirrors the cake’s texture while the warm spices tie everything together. ☕
Non-Alcoholic Options
For a kid-friendly spread, sparkling apple cider or ginger ale adds a festive touch. The effervescence cleanses the palate between bites of sweet cake. A vanilla soda (like Cream Soda) with a splash of milk creates a creamy, dessert-like drink that pairs perfectly.
For something warmer, hot chocolate with whipped cream on top is a crowd-pleaser that complements the cake’s buttery frosting. 🥤
Seasonal Adaptations
In summer, a rosé wine or peach iced tea highlights the cake’s fruity fillings. For fall, swap to a dry Riesling or pumpkin spice latte to match the season’s cozy vibes. Winter calls for a Port wine or mulled wine** to warm up the dessert experience.
Each pairing enhances the cake’s flavors while keeping the celebration theme intact. 🍂
Nutrition facts
Frequently asked questions
Can I make this alphabet cake without fondant?
Skip the fondant letters and use pre-made edible letter decorations instead—they stick directly to the frosting. For a budget-friendly option, try printed sugar letters or even chocolate letters (melted and piped onto the cake). Just let them set for 10 minutes before serving to prevent smudging.
How do I prevent the cake layers from crumbling when slicing?
Let the cake cool completely in the pans for 1 hour before removing. Chill the assembled cake in the fridge for 30 minutes before decorating—this firms up the frosting and prevents crumbs. For extra stability, brush the cake layers with simple syrup (equal parts sugar and water) before frosting.
What’s the best way to spell a name with fondant letters?
Start with the largest letters first (like the first letter of a name) and work your way to smaller ones. Use a toothpick to gently press the letters into the frosting for better adhesion. For balance, place taller letters (like "B" or "D") on the sides rather than the center. Practice on parchment paper first to plan your layout!
Can I bake this cake in advance?
Yes! Bake the layers 1 day ahead and store them wrapped in plastic at room temperature. Assemble the cake 4 hours before serving to let the frosting set. If making fondant letters ahead, keep them in an airtight container with parchment between layers to prevent sticking. Re-roll any dried-out fondant with a tiny bit of shortening.
How do I fix wobbly or crooked fondant letters?
If letters shift after setting, gently reheat them with a hair dryer on low heat to soften the fondant, then press them back into place. For extra hold, apply a thin layer of edible glue** (like corn syrup mixed with powdered sugar) between the frosting and letters. Let it dry completely before serving.