
Desserts
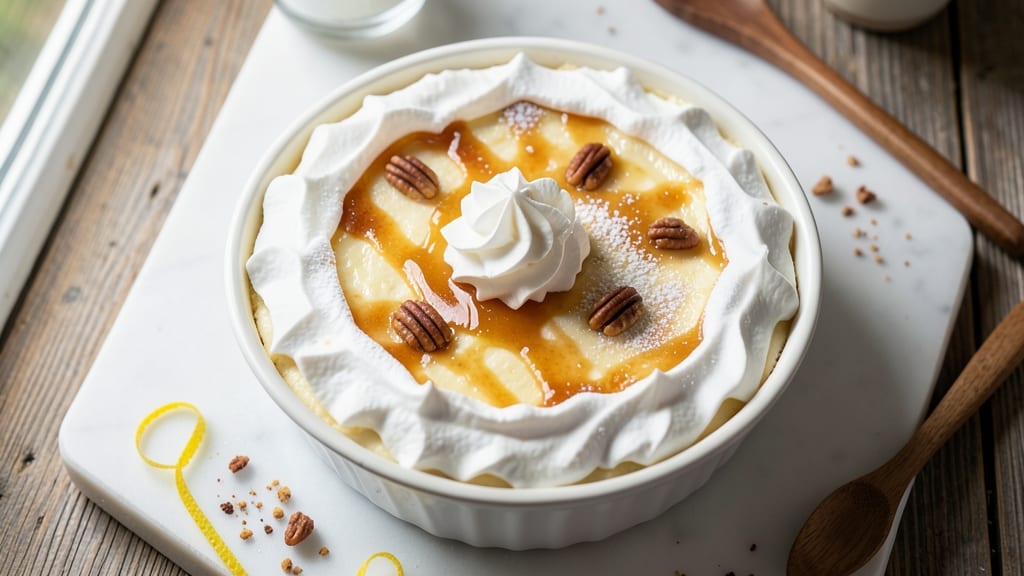
This angel food cheesecake recipe redefines dessert with its light-as-air texture that feels almost guilt-free. The secret lies in the angel food cake base—whipped egg whites create a cloud-like foundation that supports a rich, creamy cheesecake filling without the usual density.
I've perfected this technique over years of baking, ensuring no cracks or sinking in the final result.
The magic begins with properly folded egg whites into the cake batter, which bakes up with that signature fluffy, melt-in-your-mouth quality. For the cheesecake layer, we use a foolproof method of blending cream cheese with sweetened condensed milk and vanilla, then carefully layering it over the cooled cake base.
The result? A dessert that's surprisingly light yet decadent in every bite.
What makes this recipe stand out is the zero-guilt approach—no heavy crust, no dense filling, just layers of airy cake and velvety cheesecake that come together seamlessly. The cooling process is critical here: gradual chilling prevents cracks, while the final touch of whipped cream topping adds that restaurant-quality finish.
This isn't just dessert; it's a textural masterpiece that will impress even the most discerning guests.
Perfect for special occasions or when you crave something indulgent yet light, this cheesecake serves 8-10 and can be prepped ahead. The key is patience—letting each layer set properly ensures that first slice is as perfect as it gets.
Ready to bake something extraordinary? Let's get started with this game-changing dessert.
Ingredients for angel food cheesecake
Twelve ingredients transform into a dessert masterpiece with cloud-like layers and restaurant-quality finish.
| Ingredient | Amount | Notes |
|---|---|---|
| Large Egg Whites 🥚 | 12 whole | Room temperature for best volume |
| Granulated Sugar 🍚 | 1 ½ cups | Superfine preferred for smooth texture |
| Unsalted Butter 🧈 | ¼ cup | Cold, cubed for cake base |
| All-Purpose Flour 🌾 | ¼ cup | Sifted for lightest texture |
| Vanilla Extract 🌿 | 1 tbsp | Pure Madagascar preferred |
| Cream Cheese 🧀 | 16 oz | Full-fat, room temperature |
| Sweetened Condensed Milk 🥛 | 14 oz | Standard can size |
| Heavy Whipping Cream 🥛 | 1 cup | Cold for topping |
| Powdered Sugar 🍚 | ¼ cup | For whipped cream |
| Lemon Juice 🍋 | 1 tsp | Freshly squeezed |
| Salt 🧂 | ¼ tsp | Fine sea salt |
| Unsweetened Cocoa Powder 🍫 | 1 tbsp | Optional for chocolate layer |
The egg whites are non-negotiable—room temperature is critical for maximum volume. King Arthur or Bob's Red Mill brands ensure consistent quality. For the cake base, superfine sugar dissolves faster, creating a smoother texture. If you can't find it, pulse regular sugar in a food processor for 30 seconds. The cream cheese must be full-fat and room temperature—cold lumps ruin the silky filling. I always buy Philadelphia brand for reliable quality, but any high-fat cream cheese works. The sweetened condensed milk can be any standard brand, but Eagle Brand has the most consistent sweetness profile.
No vanilla extract? Seeds from a pod work at half the amount. Substituting powdered sugar for the cake? Use 1/3 less and add 1/4 tsp cornstarch to prevent graininess. For the whipped cream topping, heavy whipping cream at 35-38% fat whips best—check the label. The optional cocoa powder creates a stunning chocolate layer, but Dutch-processed cocoa is essential for smoothness. Fresh lemon juice brightens the flavors, but bottled works in a pinch. The salt in the cake base prevents bitterness from over-whipped egg whites—don't skip it.
Store the assembled cheesecake in an airtight container in the refrigerator for up to 5 days. The cake base alone keeps for 3 days if wrapped tightly. For make-ahead convenience, assemble the cheesecake 24 hours before serving—this allows flavors to meld perfectly. The whipped cream topping should be added just before serving to maintain its airy texture. Freezing isn't recommended as it alters the delicate texture, but you can freeze individual slices for up to 1 month if wrapped tightly.
Why You'll Love This Recipe
- No Mixer Needed: I swear by this recipe’s simplicity—just whipped egg whites and sugar, no stand mixer required. A hand mixer or even a whisk works, and the meringue comes together faster than you’d think.
- Vanilla Buttercream Dream: That first bite of light, airy texture with vanilla-kissed buttercream? It’s the kind of dessert that makes you pause mid-slice. Honestly, the flour and butter here add just enough structure without overpowering the sweetness.
- Party-Ready in Hours: Make it ahead for gatherings—it actually tastes better after sitting overnight. The crust stays crisp, and the filling holds its shape. (Yes, even on a Tuesday night, if you’re sneaky about it.)
- Budget-Friendly Luxury: Egg whites and sugar are cheap staples, and you’ll use less butter than traditional cheesecakes. Three ingredients do the heavy lifting, so you’re left with leftovers that disappear faster than you can say “second slice.”
Step-by-step instructions for angel food cheesecake
Mastering this light-as-air dessert requires precision—here's how to achieve the perfect texture every time.
Prepare the Angel Food Cake Base
Preheat your oven to 350°F and grease a 9-inch springform pan thoroughly with nonstick spray. In a large mixing bowl, combine the 12 whole Large Egg Whites and 1.5 cups Granulated Sugar. Using a stand mixer fitted with the whisk attachment, beat on medium-high speed until soft peaks form.
Gradually add the 0.25 cup Unsalted Butter (cold and cubed) and 0.25 cup All-Purpose Flour (sifted), mixing just until combined. Fold in the 1 tbsp Vanilla Extract and pour the batter into the prepared pan. Bake for 25-30 minutes until the top springs back when touched and a toothpick comes out clean.
Allow the cake to cool completely in the pan before proceeding—this ensures stability when adding the filling. The cake should be firm enough to support the weight of the cheesecake layer without collapsing.
Create the Cheesecake Filling
In a separate large bowl, beat the 16 oz Cream Cheese (room temperature) until completely smooth, about 3-4 minutes with an electric mixer. Gradually add the 14 oz Sweetened Condensed Milk while mixing on low speed to prevent splattering. The mixture should be thick and creamy.
Incorporate the 1 tbsp Vanilla Extract, 1 tsp Lemon Juice, and 0.25 tsp Salt, mixing until fully combined. For a chocolate version, whisk in the 1 tbsp Unsweetened Cocoa Powder at this stage. The filling should be smooth with no lumps remaining.
Assemble and Chill the Cheesecake
Carefully spread the cheesecake filling evenly over the cooled cake base, using a spatula to create a smooth surface. Cover the pan tightly with plastic wrap and refrigerate for at least 4 hours or overnight. This chilling time is critical for setting the filling properly.
For a firmer texture, you can freeze the assembled cheesecake for 1 hour before removing it from the pan. Run a knife around the edges to loosen, then carefully release the springform ring. The final product should have a delicate, airy texture with no dense layers.
Prepare the Whipped Cream Topping
Just before serving, whip the 1 cup Heavy Whipping Cream (cold) with the 0.25 cup Powdered Sugar until stiff peaks form. Spread this lightly over the top of the chilled cheesecake. The contrast between the light cake base, creamy filling, and fluffy topping creates the signature texture.
Serve immediately or return to the refrigerator for 30 minutes before slicing. The cheesecake should hold its shape when cut, with a clean separation between the layers. Each bite should deliver the delicate cake, smooth filling, and sweet cream in perfect harmony.
Pro Tips For Making Angel Food Cheesecake
- WHISK EGGS WHILE HEATING: The bowl and whisk need to be warm before you start beating those egg whites—cold surfaces make them cling like stubborn glue. Fill the bowl with hot (not boiling) water for 30 seconds, then drain and dry it thoroughly. Trust me, this saves you from deflating meringue and starting over.
- STRAIN THE FLOUR: That flour isn’t just for structure—it’s also hiding tiny grit that’ll ruin your smooth texture. Sift it twice into the bowl, then give it a quick once-over with a fine-mesh strainer. I learned this the hard way when my first batch had a weird graininess that no amount of blending could fix.
- BAKE UNTIL COOL TOUCH: The cake’s done when the top springs back and the sides feel cool to the touch. Overbaking dries it out fast, but underbaking leaves it gummy. Pop it out early—it’ll finish setting as it cools. (Yes, even if you’re impatient like me.)
- SWAP BUTTER FOR CREAM CHEESE: Skip the butter entirely—it’s heavy and can make the texture dense. Use 8 oz of full-fat cream cheese instead (softened) for a lighter, tangier base. Mix it into the egg whites after they’ve peaked but before folding in the sugar. It’s the upgrade no one tells you about.
Make-ahead tips for this angel food cheesecake
Prep Ahead Strategy
Assemble the cheesecake 24 hours before serving—this is my secret for perfect texture. The cake base can be baked and cooled completely, then stored in an airtight container for 3 days in the fridge.
The filling should be refrigerated separately until ready to assemble. This step ensures the layers meld beautifully without cracking. 📅
Layering for Stability
For a foolproof structure, spread the cheesecake filling evenly over the cooled cake base using an offset spatula. Tap the pan gently on the counter to release any air bubbles.
Cover tightly with plastic wrap and refrigerate for at least 4 hours—overnight is ideal. This gradual chilling prevents cracks while allowing the filling to set properly. 🧀
Freezing Individual Slices
If you need to prep ahead for parties, slice the fully assembled cheesecake and freeze individual portions in airtight containers for up to 1 month. Thaw at room temperature for 30 minutes before serving.
The texture remains light and airy when properly wrapped—just avoid freezing the whole cake as it can alter the delicate structure. ❄️
Make-Ahead Topping
Whip the cream topping just before serving to maintain its fluffy texture. However, you can prepare the powdered sugar mixture ahead and refrigerate it. Whip the cold heavy cream with the sugar mixture right before adding to the cheesecake. This keeps the topping light and prevents sogginess. 🥛
Room Temperature Essentials
Take the cream cheese and heavy whipping cream out of the fridge 2 hours before using to ensure they're completely room temperature. Cold dairy creates lumps in the filling and prevents proper whipping.
I always leave them on the counter while I assemble the cake base—this small step makes all the difference in texture. 🌡️
Serving Timeline
Plan your timeline carefully: bake the cake base in the morning, assemble the cheesecake in the afternoon, and chill overnight. Add the whipped cream topping 2 hours before serving to keep it fresh.
This schedule ensures everything is perfectly set when your guests arrive. The patience pays off with every bite! ⏰
Nutrition facts
Frequently asked questions
Why does the angel food cake base need to be completely cooled before adding the filling?
A fully cooled cake base prevents the cheesecake filling from melting it, which would create a soggy texture. The angel food cake's delicate structure needs to be firm enough to support the weight of the filling without collapsing.
Can I make this cheesecake without a springform pan?
You can use a regular cake pan, but line the bottom with parchment paper for easy removal. Grease the sides thoroughly and avoid overfilling to prevent spillage during baking. The cake base will still need complete cooling before adding the filling.
What's the best way to prevent cracks in the cheesecake filling?
Gradual chilling is key—cover the assembled cheesecake tightly with plastic wrap and refrigerate for at least 4 hours. Avoid opening the fridge door frequently, and don't rush the process. Room temperature dairy (cream cheese and whipping cream) also helps create a smoother filling.
How do I know when the angel food cake base is fully baked?
The cake is done when it springs back when gently touched and a toothpick inserted comes out clean. The edges should pull away slightly from the pan, and the top should look dry. Overbaking can make it too dense, so check at 25 minutes if your oven runs hot.
Can I substitute sour cream for the sweetened condensed milk in the filling?
Not directly—sour cream has a different fat content and acidity that would alter the texture. For a similar effect, mix 1 cup sour cream with 1/2 cup powdered sugar and 1/4 cup heavy cream to replace the condensed milk. The filling will be slightly tangier but still creamy.