
Desserts
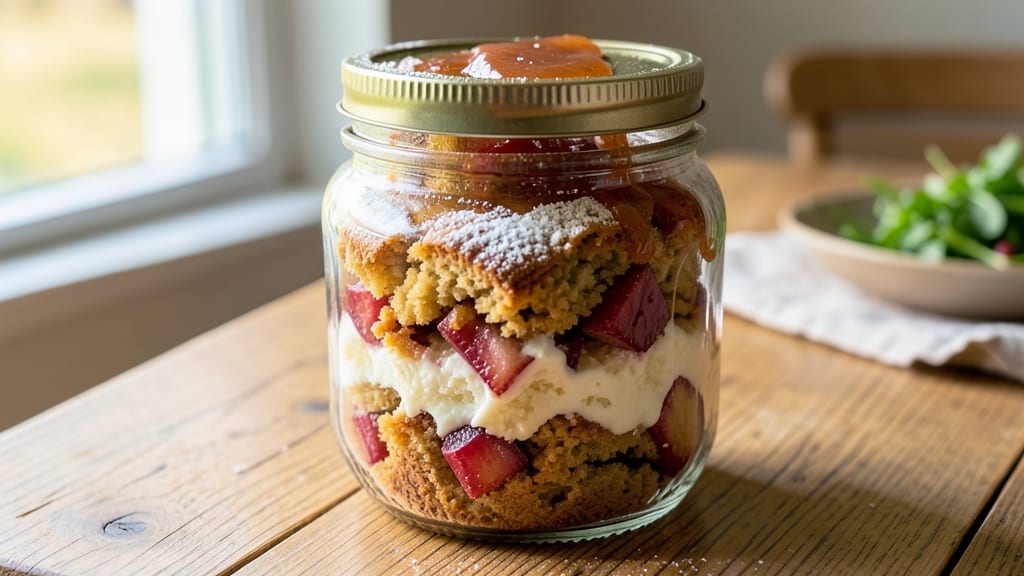
This apple cake in a jar recipe transforms simple ingredients into a showstopping dessert that requires no baking skills—just layering and patience. The magic happens in the warm vanilla-spice aroma that fills your kitchen as you assemble the jar, creating a dessert that feels both rustic and elegant.
What makes this recipe special is how effortlessly it combines tender cake layers, spiced apples, and creamy filling into a portable treat that’s perfect for gifts or impromptu celebrations.
Unlike traditional cakes, this version requires no mixing or frosting—just measuring, layering, and letting the jar do the work. The cake batter is light and fluffy, baked in a single layer before being cut into strips and arranged with spiced apple slices and vanilla pudding.
The result is a dessert that’s as beautiful as it is delicious, with every bite offering a perfect balance of sweet cake, tender apples, and creamy filling.
The best part? This recipe delivers restaurant-quality results in under an hour, with minimal cleanup. Each jar becomes a personalized gift or a stunning centerpiece for any occasion, from potlucks to holiday gatherings.
The combination of warm spices, fresh apples, and vanilla creates a flavor profile that’s nostalgic yet sophisticated, making it a crowd-pleaser every time.
Whether you’re prepping for a party or simply craving a cozy dessert, this apple cake in a jar is the perfect solution. The instructions are straightforward, and the assembly process is foolproof, ensuring you’ll achieve perfectly layered jars every time.
Ready to create something magical with just a few simple steps?
Ingredients for apple cake in a jar
Simple ingredients that create magic in a jar—no baking skills required.
| Ingredient | Amount | Notes |
|---|---|---|
| All-Purpose Flour 🌾 | 2 cups | Sifted for fluffiness |
| Granulated Sugar 🍚 | 1 ½ cups | White or light brown |
| Unsalted Butter 🧈 | 1 cup | Softened to room temp |
| Large Eggs 🥚 | 2 whole | Room temperature |
| Vanilla Extract 🍯 | 1 tbsp | Pure vanilla preferred |
| Baking Powder 🧂 | 2 tsp | Not baking soda |
| Ground Cinnamon 🌿 | 1 ½ tsp | Freshly ground |
| Salt 🧂 | ½ tsp | Fine sea salt |
| Apples 🍎 | 4 medium | Firm, sweet variety |
| Lemon Juice 🍋 | 2 tbsp | Freshly squeezed |
| Powdered Sugar 🍚 | 1 cup | For dusting layers |
| Vanilla Pudding Mix 🧁 | 1 box | Instant or prepared |
| Heavy Cream 🥛 | 1 cup | Whipped to soft peaks |
| Ground Nutmeg 🌿 | ¼ tsp | Freshly grated |
| Caramel Topping 🍬 | ½ cup | Store-bought or homemade |
The apples are the star here, so grab firm, sweet varieties like Honeycrisp or Gala—they hold their shape beautifully. Trader Joe's often has pre-sliced apples in the baking aisle if you're short on time, but whole apples work too (just peel and slice them yourself). For the flour, King Arthur or Gold Medal are my go-tos—they bake up light and fluffy. If you're using brown sugar, light brown gives that subtle caramel note without overpowering the vanilla. And that vanilla extract? No imitation stuff—splurge on the good kind. The nutmeg is worth toasting lightly in a dry pan first for deeper flavor (trust me on this).
No vanilla pudding mix? Make your own with milk, sugar, cornstarch, and vanilla bean—it's easier than you think. Running short on apples? Pear slices work beautifully with a pinch of cinnamon. The caramel topping can be store-bought (like Smucker's), but homemade is simple—just melt butter, sugar, and cream until glossy. For the cake layer, if you don't have powdered sugar, you can use regular sugar sifted finely, but it won't be as smooth. The heavy cream? Full-fat is non-negotiable—it whips up lighter and tastes richer. And if you're making this ahead, prep the cake strips and apple slices the day before—they'll keep perfectly in the fridge until assembly time.
This dessert keeps beautifully—assembled jars stay fresh for 3 days in the fridge, and the components (unassembled) last even longer. Freeze the caramel topping in ice cube trays for easy use later. The cake strips can be baked ahead and stored in an airtight container for up to 5 days. Pro tip: Label your jars with the date and contents if gifting—they make stunning presents that actually taste amazing. And if someone asks why it's so good? Just tell them it's the vanilla-spice magic doing the work.
Why You'll Love This Recipe
- No Mixer Needed: This recipe’s magic happens in the jar—just toss the dry ingredients (flour, sugar, eggs) with melted butter and vanilla, then fold in your apples. No sifting, no overmixing, no stress. The butter keeps it tender while the eggs bind everything together like a dream.
- Vanilla-Apple Magic: That vanilla extract isn’t just extra—it’s the secret. Paired with the warm, spiced apples (even if you skip cinnamon), it turns this into a cake that tastes like autumn in every bite. Sweet but not cloying, with just enough richness from the butter to make it feel special.
- Jar-to-Table Flexibility: Make it ahead and store the jars for days—perfect for breakfast, a quick snack, or even a last-minute dessert. Pro tip: Add a scoop of ice cream or a drizzle of caramel when serving, and suddenly it’s a party dessert. No fuss, just flavor.
- Budget-Friendly Indulgence: You’re using pantry staples here: flour, sugar, butter, eggs, and vanilla. That’s it. No pricey specialty ingredients, no wasted leftovers (the jars keep well), and enough servings to feed the family without breaking the bank. Homemade cake that doesn’t guilt you.
Step-by-step instructions for layered vanilla-spice apple cake in a jar
This cake comes together in minutes with layers of spiced apple cake, creamy vanilla pudding, and caramel drizzle.
👨🍳 Step 1: Prepare the Apple Cake Mixture
In a large mixing bowl, combine the 2 cups all-purpose flour, 1.5 cups granulated sugar, 1.5 tsp ground cinnamon, 0.5 tsp salt, and 2 tsp baking powder. Whisk until evenly distributed—you want no visible flour streaks for a tender crumb. In a separate bowl, beat the 1 cup softened unsalted butter and 2 whole large eggs until light and fluffy, about 3-4 minutes using an electric mixer.
Gradually add the dry ingredients to the butter mixture, mixing on low speed until just combined. Stir in the 1 tbsp vanilla extract and 2 tbsp lemon juice. This brightens the apples and balances the sweetness. Fold in the 4 medium apples, peeled and finely diced—you want them evenly distributed throughout the batter. The mixture will look thick and chunky, which is perfect for that rustic texture.
🍳 Step 2: Assemble the Layers in Jars
Divide the cake mixture evenly among 4 clean, dry jars (I use 16-ounce mason jars). Tap each jar gently on the counter to remove any air bubbles and ensure the batter settles evenly. This step is crucial for uniform layers later. Place the jars in the refrigerator and let them chill for at least 30 minutes—this helps the cake set properly when baked.
While the cake mixture chills, prepare the vanilla pudding layer. In a medium bowl, mix the 1 box vanilla pudding mix with 1 cup heavy cream and 0.25 tsp ground nutmeg until smooth. The nutmeg adds a warm, cozy depth that complements the apples beautifully. Divide this mixture evenly among the jars, spooning it over the chilled cake batter. The pudding should cover the batter completely, creating a distinct layer.
🔥 Step 3: Bake the Layered Cakes
Preheat your oven to 350°F. Place the jars in a deep baking dish and pour hot water into the dish until it reaches halfway up the sides of the jars. This water bath ensures even baking and prevents the jars from cracking. Bake for 40-45 minutes, or until the tops of the cakes are golden brown and a toothpick inserted into the center comes out clean.
Here's the thing—don't overbake. The cakes will continue cooking slightly as they cool. You want them moist and tender, not dry. If the tops brown too quickly, tent the jars loosely with aluminum foil after 25 minutes to prevent over-browning. The pudding layer will thicken and set as it bakes, creating that perfect creamy contrast.
🥘 Step 4: Dust with Powdered Sugar and Add Caramel
Remove the jars from the oven and let them cool completely at room temperature. This can take up to 1 hour, but patience is key—rushing this step can make the layers slide apart. Once cooled, dust each cake generously with 1 cup powdered sugar using a fine-mesh sieve. This adds a delicate, sweet finish that ties everything together.
Drizzle 0.5 cup caramel topping over each cake, letting it cascade down the sides for that restaurant-quality presentation. The caramel adds a rich, buttery contrast to the spiced apples and creamy pudding. Serve immediately or store in the refrigerator for up to 3 days. The flavors only get better as they meld together overnight!
Pro Tips For Making Apple Cake In A Jar
- MEASURE BUTTER COLD: Take the unsalted butter straight from the fridge—no softening needed—then cut it into cubes the size of a nickel. This keeps the cake layers tender and prevents the batter from turning greasy when you mix it in later. I used to melt it first, and the texture suffered every time.
- WHISK EGGS UNTIL THICK: Beat those large eggs with the sugar until the mixture lightens to a pale yellow and leaves a trail when the whisk is lifted. This step actually aerates the batter, giving your cake a lighter crumb. Skip it, and you’ll end up with something dense—trust me, I’ve done it.
- FILL JARS HALFWAY FIRST: Pour the batter into clean jars only until they’re about halfway full, then add the sliced apples. This prevents the apples from sinking to the bottom and ensures they’re fully coated in batter. I learned this the hard way when my first batch had a layer of naked apples at the bottom.
- BAKE JARS IN A WATER BATH: Place the jars in a deep roasting pan and fill the pan halfway with hot water—this keeps the jars from overheating and ensures even baking. The water bath also helps the cake rise straight up in the jars, so it’s not lopsided. (Yes, even if you’re impatient like me.)
Pro cooking tips for this recipe
Batter Consistency
The cake batter should be thick but pourable—almost like a chunky cookie dough. If your batter is too thin, add 1-2 tbsp extra flour to prevent the apples from sinking to the bottom.
I’ve found that King Arthur flour absorbs moisture better, giving you that perfect rustic texture. Overmixing after adding the dry ingredients can make the cake dense, so mix just until combined. 🍎
Chilling the Jars
Never skip the 30-minute chilling step—this is what creates those clean layers. The batter needs time to set slightly so it doesn’t slide around during baking. Pro tip: Place the jars on a tray in the fridge to catch any drips.
If you’re short on time, pop them in the freezer for 15 minutes—just don’t let them freeze solid. I once forgot this step and ended up with a messy, runny cake. Lesson learned! ❄️
Water Bath Baking
Using a water bath (baking dish with hot water) is non-negotiable for even cooking. Fill the dish until the water reaches halfway up the jars—any higher and the jars might crack. If your jars are different sizes, use a baking rack to elevate them slightly.
I like to place a silicon baking mat in the dish first to protect the jars and make cleanup easier. 🔥
Caramel Drizzle Trick
For that professional-looking drizzle, warm the caramel topping slightly (30 seconds in the microwave) to make it flow more easily. Use a paintbrush or squeeze bottle to control the drizzle—this prevents messy globs.
I also like to add a pinch of sea salt to the caramel before drizzling for a sweet-savory kick. The contrast makes the whole dessert pop! 🍬
Powdered Sugar Dusting
Sift the powdered sugar through a fine-mesh sieve for an even, snowy finish. Tap the jar gently on the counter afterward to settle the sugar into the crevices. If you’re short on powdered sugar, confectioners’ sugar works, but avoid granulated sugar—it won’t dissolve properly.
I’ve also seen people use cinnamon sugar for a spiced twist, but stick to plain powdered sugar for the classic look. ✨
Storage Hacks
Store assembled jars in the fridge for up to 3 days, but remove them 30 minutes before serving to let the layers soften slightly. For longer storage, freeze the caramel topping in ice cube trays—thaw and reheat as needed.
If gifting, wrap the jars in kraft paper with a ribbon for a rustic touch. I always label mine with the date and ingredients—it’s a thoughtful detail that makes the gift feel special. 🎁
Nutrition facts
Frequently asked questions
Can I make this apple cake in a jar without a water bath?
The water bath is essential for even baking and preventing cracked jars. If you're concerned about cleanup, use a baking rack in a deep dish and add water halfway up the jars. For extra insurance, preheat your jars in the oven for 5 minutes before adding batter to prevent thermal shock.
What's the best way to slice apples for this recipe?
Use a mandoline slicer for perfectly even ¼-inch slices—they hold their shape beautifully. For a rustic look, cut into irregular chunks. Always toss slices with 1 tsp lemon juice to prevent browning before mixing into the batter.
How do I adjust the recipe for smaller jars?
For 8-ounce jars, reduce each layer by half: ½ cup cake batter, ¼ cup pudding, and 1 tbsp caramel. Bake at 325°F for 30-35 minutes—smaller jars cook faster. The chilling time remains the same (30 minutes) to maintain layer integrity.
Can I substitute the vanilla pudding with another filling?
Yes! Try chocolate pudding for a decadent twist or lemon curd for a tangy contrast. For a lighter option, use whipped cream mixed with 1 tsp vanilla extract. Just ensure your filling is thick enough to hold its shape during baking.
Why did my cake layers slide apart when cooling?
This usually happens if you skipped the 30-minute chilling step or overfilled the jars. For next time:
- Chill batter longer (up to 1 hour),
- Use slightly less batter (fill jars only ⅔ full), and
- Bake at 325°F instead of 350°F for a slower set. The pudding layer should be ½-inch thick max.