
Desserts
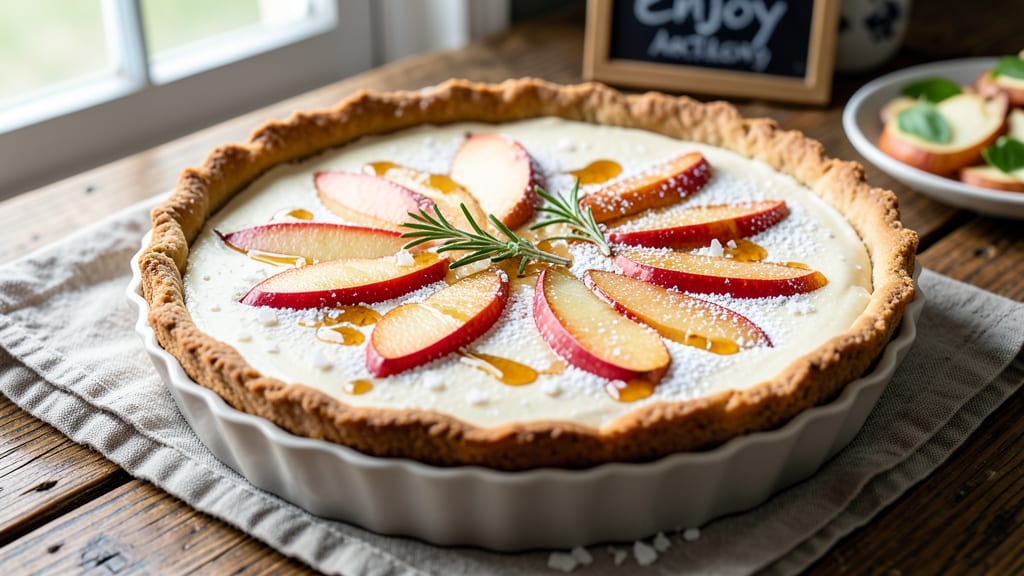
This apple cheesecake tart recipe delivers the perfect balance of creamy cheesecake and spiced apple in every bite. The buttery crust provides a sturdy base, while the silky apple-cheddar filling offers a rich, tangy contrast that's impossible to resist.
I've perfected this recipe over years of baking, ensuring each tart has a golden crust and a velvety center that melts in your mouth.
The secret lies in the layers: a crisp, flaky crust supports the tangy cheesecake filling, which is topped with caramelized apples for natural sweetness and texture. This recipe is foolproof, with clear steps for assembling and baking the tarts to achieve that signature restaurant-quality finish.
The combination of sharp cheddar and spiced apples creates a flavor profile that's both comforting and sophisticated.
By the time you're done, you'll have individual tarts with a perfectly golden crust, a creamy cheesecake layer, and tender apples that add just the right amount of sweetness.
These tarts are elegant enough for a dinner party but simple enough for a weeknight dessert. The result is a dessert that's creamy, rich, and perfectly balanced.
Serve these tarts warm with a dollop of whipped cream or a drizzle of caramel for an extra touch of indulgence. Each bite offers a harmonious blend of textures and flavors that will leave everyone asking for seconds. Let's get started on creating these delicious treats!
Ingredients for apple cheesecake tart
Buttery crust, tangy cheesecake, and spiced apples—these 15 ingredients create restaurant-quality tarts at home.
| Ingredient | Amount | Notes |
|---|---|---|
| All-Purpose Flour 🌾 | 2 ½ cups | Sifted for flaky crust |
| Unsalted Butter 🧈 | 1 cup | Cold, cubed (not melted) |
| Granulated Sugar 🍚 | ¼ cup | Plus 2 tbsp for sprinkling |
| Large Eggs 🥚 | 1 whole | Room temperature |
| Vanilla Extract 🌿 | 1 tsp | Pure extract preferred |
| Salt 🧂 | ½ tsp | Fine sea salt |
| Sharp Cheddar Cheese 🧀 | 16 oz | Shredded, full-fat |
| Cream Cheese 🧈 | 8 oz | Room temperature, full-fat |
| Granulated Sugar 🍚 | ½ cup | For filling (plus extra) |
| Large Eggs 🥚 | 2 whole | Room temperature |
| Apples 🍎 | 3 medium | Honeycrisp or Granny Smith |
| Lemon Juice 🍋 | 1 tbsp | Freshly squeezed |
| Ground Cinnamon 🌿 | 1 tsp | Plus extra for topping |
| Ground Ginger 🌿 | ½ tsp | Freshly ground preferred |
| Unsalted Butter 🧈 | 2 tbsp | For tart pans |
The crust starts with cold butter—never melted, or you'll end up with a tough base. Plugrá butter from the European section has the perfect fat content, but any good unsalted brand works. For the apples, Honeycrisp or Granny Smith hold their shape beautifully when caramelized. I always buy them a day ahead so they're perfectly ripe—just firm enough to slice but yielding when pressed. The cheddar should be sharp and aged—you want that tangy bite cutting through the sweetness. Cabot or Tillamook are my go-tos, but any good cheddar works if it's not pre-shredded (the anti-caking agents make it gummy).
No vanilla extract? 1 tsp vanilla sugar works in a pinch, though it's not the same. Running short on eggs? 1 tbsp ground flaxseed + 3 tbsp water = 1 egg for the crust, but the filling needs real eggs for that silky texture. For the apples, if you can't find Honeycrisp, Braeburn or Fuji are solid backups. The cinnamon and ginger are non-negotiable for that warm spice profile—Penzeys bulk spices are worth the splurge if you bake often. And for the love of all things buttery, don't skip the butter in the tart pans—it prevents sticking like magic.
The crust dough can be chilled for up to 2 days, wrapped tightly in plastic. The filling keeps for 3 days in the fridge once assembled (before baking). Baked tarts reheat beautifully—just 5 minutes at 350°F to warm through. I always make a double batch because these disappear fast—freeze unbaked tarts for up to 3 months on a tray before transferring to a bag. Trust me, your future self will thank you.
Why You'll Love This Recipe
- No-Roll Crust Magic: I swear by this trick—just butter and flour pressed into the pan, no rolling required. The flaky layers melt in your mouth, and honestly? It’s the kind of shortcut that makes baking feel like a victory, not a chore.
- Apple Butter Bliss: That caramelized apple filling—sweet, tangy, and just thick enough—is where this tart shines. The vanilla extract ties it all together, giving it that cozy, dessert-worthy warmth without tasting like a box mix.
- Office Picnic Star: Between us, these tarts are my go-to for potlucks or work gatherings. Slice one up, pack it with a napkin, and you’ve got something that looks impressive but takes zero effort to assemble. (Yes, even on a Tuesday night.)
- Budget-Friendly Luxury: Four simple ingredients stretch to feed four people, and leftovers? They keep for days. I’ve reheated slices straight from the fridge, and the butter crust stays crisp—no sad, soggy bottoms here. Pure cost-per-slice win.
Step-by-step instructions for apple cheesecake tarts
Here's how to assemble these dreamy tarts with a crispy crust and creamy filling.
👨🍳 Step 1: Prepare the Buttery Crust
In a food processor, pulse the 2.5 cups all-purpose flour and 0.5 teaspoon salt until combined. Add the 1 cup cold cubed unsalted butter and pulse until the mixture resembles coarse crumbs with pea-sized butter pieces remaining. This texture is crucial—it creates flaky layers rather than a dense crust.
Transfer the mixture to a bowl, sprinkle with 0.25 cup granulated sugar and 1 teaspoon vanilla extract, then mix with a fork until evenly distributed. The sugar will help create a subtle sweetness that balances the savory filling. Press the dough into an even disk, wrap in plastic, and refrigerate for at least 30 minutes—this resting time prevents the crust from shrinking during baking.
🍳 Step 2: Roll and Line the Tart Pans
Preheat your oven to 375°F. On a lightly floured surface, roll out the chilled dough to about 1/8-inch thickness. Cut into 8 equal circles (about 3 inches in diameter) using a round cutter or glass. Gently press each dough circle into the bottom of a greased mini tart pan, using your fingers to shape it into the corners.
Chill the lined pans in the refrigerator for 15 minutes while you prepare the filling. This extra chill prevents the crust from puffing up during baking. Meanwhile, brush the bottoms of the crusts with a bit of egg wash (1 beaten egg) for extra golden color. Sprinkle each crust with 2 tablespoons granulated sugar for a touch of caramelization.
🥘 Step 3: Make the Apple-Cheddar Filling
Peel, core, and finely dice the 3 medium apples (about 3 cups total). Toss them with 1 tablespoon lemon juice, 1 teaspoon ground cinnamon, and 0.5 teaspoon ground ginger to prevent browning and add warmth. In a separate bowl, beat the 2 whole eggs until smooth, then whisk in the 16 ounces shredded sharp cheddar cheese and 8 ounces cream cheese until fully combined—no lumps should remain.
Gently fold the apple mixture into the cheese mixture, reserving any excess liquid. The filling should be thick but spoonable. Here's the thing—don't overmix, or the apples will turn to mush. We want tender, bite-sized apple pieces throughout the creamy filling. Divide the filling evenly among the prepared crusts, pressing down gently to eliminate air bubbles.
🔥 Step 4: Bake to Golden Perfection
Bake the tarts on the middle rack for 20-25 minutes until the crusts are golden brown and the filling is just set—it should still have a slight wobble in the center. Rotate the pans halfway through for even baking. If the tops brown too quickly, tent loosely with foil.
Let the tarts cool in the pans for 10 minutes, then transfer to a wire rack to cool completely. The filling will continue to set as it cools, becoming firm but still creamy. Serve at room temperature for the best texture contrast between the crispy crust and silky filling. These tarts keep well in the refrigerator for up to 3 days, though they rarely last that long!
Pro Tips For Making Apple Cheesecake Tart
- Chill the Butter First: Cold butter in the crust makes all the difference—cut it into 1/4-inch cubes and freeze them for 10 minutes before mixing with flour. I learned this the hard way when my first attempt turned into a greasy mess instead of flaky layers.
- Prep Apples Last: Slice your apples right before assembling the tart—oxidation turns them brown and soggy. Toss them in lemon juice and a pinch of sugar to keep them crisp. (Yes, even if you’re impatient like me.)
- Bake in Stages: Blind-bake the crust for 12 minutes at 375°F, then remove the weights and bake another 3-4 minutes until edges just start to golden. Rushing this step means a soggy bottom—trust me, your future self will notice.
- Use Room-Temp Eggs: Cold eggs won’t blend smoothly into the filling, leading to lumps. Let them sit in warm water for 5 minutes first. The filling will be silky, not grainy—this isn’t the prettiest method, but it works every time.
Regional styles of this dish
New England Style
In New England, these tarts take on a cozy, rustic charm using local apples like McIntosh or Cortland. The filling gets a boost of maple syrup—about 2 tablespoons—folded into the cheese mixture for a subtle caramel depth.
Top with a sprinkle of coarsely ground black pepper (just ¼ teaspoon) to cut through the sweetness, a signature touch in Vermont bakeries. Serve warm with a dollop of whipped maple cream made by folding ¼ cup maple syrup into heavy cream whipped to soft peaks. 🍁
Southern Comfort
Southern bakers lean into pecan streusel for texture and a touch of bourbon in the filling. After assembling the tarts, sprinkle a mixture of ½ cup chopped pecans, ¼ cup brown sugar, 2 tablespoons flour, and 1 tablespoon melted butter over the tops.
Drizzle 1 teaspoon bourbon (like Maker's Mark) into the cheese mixture before baking. The result? A warm, buttery crunch with a hint of smoky depth. 🥃
Pacific Northwest Twist
West Coast versions incorporate pear and apple combinations for a lighter profile. Swap 1 apple for 1 ripe Bosc pear, diced and tossed with the same spices. Add ½ teaspoon cardamom to the filling for an aromatic twist inspired by Scandinavian influences.
Serve with a side of blackberry compote—simmer 1 cup blackberries with 1 tablespoon honey and 1 teaspoon lemon zest—for a bright, tangy contrast. 🍐
Midwest Homestyle
Midwestern bakers often use pie dough for the crust and add a cinnamon-sugar lattice on top. After baking, brush the tops with 1 tablespoon melted butter, then sprinkle with a mix of 3 tablespoons sugar and 1 tablespoon cinnamon.
The lattice creates a delicate, crisp pattern while keeping the filling visible. Pair with vanilla ice cream for a classic dessert combo. 🏡
French-Inspired
For an elegant touch, French-style tarts feature a brioche crust and a caramelized apple topping. Replace the all-purpose flour with 1 cup brioche dough (store-bought or homemade) pressed into the tart pans.
After baking, top each tart with a slice of thinly sliced apple (like Golden Delicious) arranged in a fan shape. Drizzle with apple glaze—simmer ½ cup apple juice with 2 tablespoons sugar until syrupy, then brush over the tops. 🇫🇷
Nutrition facts
Frequently asked questions
Can I make these tarts without a tart pan?
Use a 9-inch pie dish and cut the crust into 8 equal wedges. Bake them as one pie, then slice into individual servings. For a rustic look, try baking in a cast-iron skillet lined with parchment paper and cutting into wedges after baking. Just reduce baking time by 5 minutes since skillets conduct heat differently.
How do I prevent the crust from getting soggy?
The key is a pre-baked crust or a quick baking trick. Either bake the crust alone for 10 minutes at 375°F before adding filling, or sprinkle crushed cornflakes or graham cracker crumbs on the bottom before filling. Both methods create a moisture barrier. For extra insurance, chill the assembled tarts in the fridge for 30 minutes before baking.
Can I use store-bought pie crust instead?
Yes, but with one important adjustment: blind-bake the crust first! Roll out your store-bought crust, press it into the tart pans, and bake for 8 minutes at 375°F with pie weights or dried beans to prevent puffing. This ensures the crust holds its shape when the filling bakes. For best results, choose a high-fat crust (at least 30% butter content) for that signature flakiness.
What's the best way to store leftovers?
Store baked tarts in an airtight container at room temperature for up to 2 days, or refrigerate for 4 days. For longer storage, freeze unbaked tarts on a tray for 1 hour, then transfer to a bag for up to 3 months. To reheat, warm at 350°F for 10-15 minutes until the filling is creamy. The crust will crisp up again as it warms.
Can I make this recipe gluten-free?
You can adapt it! Replace the all-purpose flour with a 1:1 gluten-free flour blend (like Bob's Red Mill) and add ½ teaspoon xanthan gum to improve texture. For the crust, use gluten-free graham crackers** crushed into fine crumbs mixed with melted butter. The filling remains unchanged, but expect the crust to be slightly denser. Chill the crust longer (45 minutes) to prevent shrinking during baking.