
Desserts
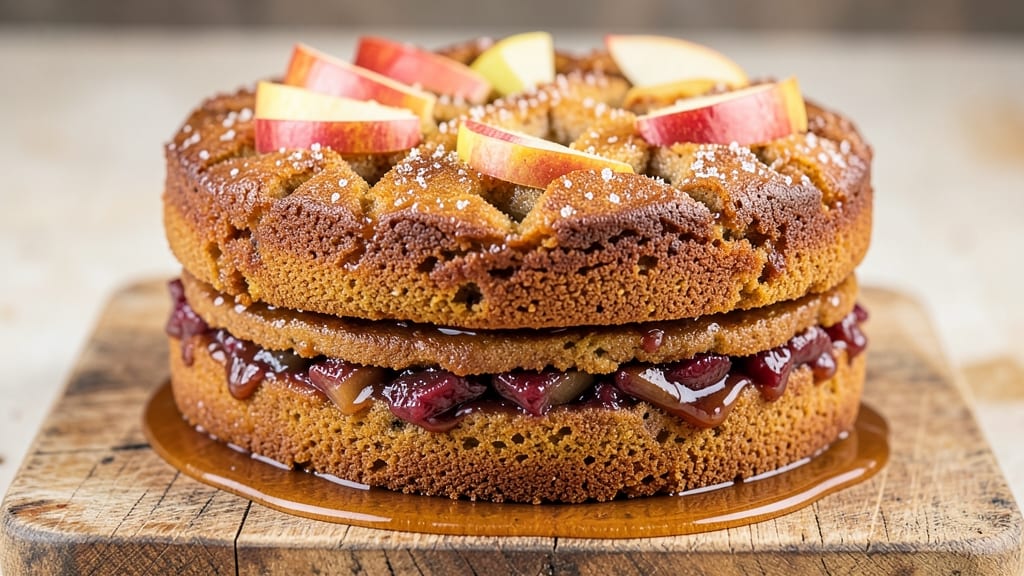
This apple cider layer cake recipe delivers the perfect balance of spiced caramel swirls and buttery layers, capturing autumn's coziest flavors in every bite. 🍂 The secret lies in infusing the cake batter with warm apple cider and cinnamon, while the filling combines rich caramel and cream cheese for a texture that's both tender and indulgent.
I've perfected this recipe to ensure moist layers that stay fresh for days, with a frosting so flavorful it becomes the star of the show.
The beauty of this cake is its versatility—it works equally well for fall gatherings or quiet weeknight treats. Each layer bakes to a golden brown, revealing just the right amount of crumb, while the caramel swirls add a touch of elegance without complicating the process.
What sets this apart is the apple cider's natural sweetness, which reduces the need for extra sugar while enhancing the cake's depth of flavor.
By the time you're done assembling, you'll have a showstopping dessert with perfectly balanced layers, a glossy frosting that clings beautifully, and caramel swirls that add both visual appeal and rich, buttery sweetness.
The cake stays moist thanks to a simple technique: wrapping it tightly in plastic while it cools, ensuring every slice is as tender as the first.
Serve warm with a scoop of vanilla ice cream or enjoy at room temperature with a sprinkle of cinnamon. This recipe scales easily for parties, and leftovers reheat beautifully. Here's how to create this autumnal masterpiece that tastes like home-baked perfection.
Ingredients for apple cider layer cake
Eight layers of autumn flavor, built on apple cider and cinnamon spice magic.
| Ingredient | Amount | Notes |
|---|---|---|
| All-Purpose Flour 🌾 | 3 ½ cups | Sifted for light texture |
| Granulated Sugar 🍚 | 2 ½ cups | White or light brown |
| Unsalted Butter 🧈 | 2 cups | Cold, cubed for layers |
| Apple Cider 🍎 | 1 ½ cups | Unfiltered, room temperature |
| Large Eggs 🥚 | 4 whole | Room temperature for best mixing |
| Pure Vanilla Extract 🌿 | 2 tsp | High-quality for flavor |
| Ground Cinnamon 🌶️ | 2 tsp | Freshly ground preferred |
| Salt 🧂 | 1 tsp | Fine sea salt |
| Baking Powder 🍞 | 2 tsp | Double-acting preferred |
| Cream Cheese 🧀 | 8 oz | Room temperature for filling |
| Powdered Sugar 🍚 | 3 cups | For frosting |
| Heavy Cream 🥛 | 1 cup | Cold for frosting |
| Store-Bought Caramel Sauce 🍯 | 1 ½ cups | High-quality for swirls |
| Ground Nutmeg 🌶️ | ½ tsp | Freshly grated for warmth |
The apple cider is the heart of this cake—unfiltered, room-temperature cider from a local orchard is ideal, but store-bought works fine too. Look for brands like Tree Top or Mott's that have that rich, natural sweetness. The cream cheese for the filling should be full-fat and at room temperature—it makes all the difference in that silky texture. For the caramel swirls, I always use high-quality store-bought caramel sauce (like Smucker's) because it's consistent and saves time. The flour? King Arthur or Gold Medal brands give you that perfect crumb.
No apple cider? Substitute with unsweetened apple juice—just add a pinch more cinnamon to compensate. Running low on cream cheese? Substitute with equal parts mashed banana and Greek yogurt for a lighter filling. The frosting can be made with buttercream instead of whipped cream if you prefer a more stable texture. For the caramel swirls, if you're ambitious, you can make your own with butter, sugar, and a splash of cider—just don't skip the salt. The nutmeg is optional but adds that cozy autumnal depth, so don't skip it if you've got it.
This cake keeps beautifully for 5 days in the fridge, wrapped tightly in plastic. For longer storage, freeze the assembled cake (unfrosted) for up to 3 months
Why You'll Love This Recipe
- Pantry-Friendly Magic: I swear by this one—no specialty ingredients, just flour, sugar, butter, and that one bottle of apple cider I always have lurking. The moment I mix the warm cider into the batter, the kitchen smells like autumn in a mug, and that’s half the battle won.
- Moisture That Lasts: The butter and eggs create layers so tender they don’t dry out by day three. I’ve had slices from a weekend bake still taste fresh enough to fool my coffee crew into thinking they’re brand new—seriously, the crumb stays soft like a cloud.
- Crowd-Pleaser Flex: This cake is my go-to for birthdays, potlucks, or just because. Swap the cider for spiced rum for adults, or keep it kid-friendly with vanilla frosting. Honestly, the only debate is whether to serve it plain or with whipped cream—and that’s never a bad problem to have.
- Leftovers That Pay Off: One batch feeds eight, but I’ll eat two slices myself before the guests even arrive. The frosting (if you use it) keeps well, and the cake itself? Stays moist enough to reheat in the microwave for a second-life breakfast. Budget win, flavor win.
Step-by-step instructions for apple cider layer cake
Here's how to bake a moist, spiced cake with rich caramel swirls and velvety cream cheese frosting.
👨🍳 Step 1: Prepare the Cake Batter
Preheat your oven to 350°F and grease three 8-inch round cake pans, lining the bottoms with parchment paper. In a large mixing bowl, combine the 3.5 cups all-purpose flour, 2.5 cups granulated sugar, 2 tsp baking powder, 2 tsp ground cinnamon, 1 tsp salt, and 0.5 tsp ground nutmeg. Whisk until evenly distributed—this ensures even baking and prevents dense spots.
In a separate bowl, beat the 2 cups unsalted butter until creamy, about 2 minutes. Add the 4 whole large eggs one at a time, mixing well after each addition. Stir in the 1.5 cups apple cider and 2 tsp pure vanilla extract until fully incorporated. Gradually add the dry ingredients to the wet, mixing on low speed until just combined—overmixing develops gluten and makes the cake tough.
🍳 Step 2: Bake the Layers
Divide the batter evenly among the prepared pans, filling each about ⅔ full. Bake for 25-30 minutes or until a toothpick inserted into the center comes out clean. The edges should be light golden brown, but the tops may look slightly underdone—they'll firm up as they cool.
I like to rotate the pans halfway through baking for even browning. Let the cakes cool in the pans for 10 minutes before transferring to a wire rack to cool completely. This gradual cooling prevents cracking and ensures even layers when assembling.
🥘 Step 3: Make the Cream Cheese Frosting
While the cakes cool, beat the 8 oz cream cheese and 2 cups unsalted butter together until smooth and creamy, about 3-4 minutes. Gradually add the 3 cups powdered sugar, mixing until light and fluffy. In a separate bowl, whip the 1 cup heavy cream to stiff peaks, then gently fold it into the cream cheese mixture for a lighter texture.
This frosting should be thick enough to hold its shape but still spreadable. If it's too stiff, add 1-2 teaspoons of milk to loosen it. Taste and adjust sweetness with additional powdered sugar if needed—balance matters here.
🍰 Step 4: Assemble the Cake
Level the tops of the cooled cake layers if needed, then place the first layer on a cake stand or plate. Spread about ½ cup of the store-bought caramel sauce evenly over the top, leaving a ½-inch border uncovered. Repeat with the second layer, then add the frosting.
Pipe or spread the frosting evenly over the second layer, then add the third layer on top. Spread remaining frosting over the entire cake, creating a smooth base for decorating. Use a spatula to create swirls or a simple crumb coat if you prefer a polished look.
⏰ Step 5: Add Caramel Swirls and Chill
Use a piping bag or spoon to drizzle the remaining 1.5 cups store-bought caramel sauce in decorative swirls over the frosting. Work quickly to create clean lines—warm caramel flows more easily. Refrigerate the cake for at least 2 hours before serving to let the flavors meld and the frosting set.
This chilling step is crucial—it allows the cream cheese frosting to firm up slightly while keeping the cake moist. Serve slices at room temperature for the best texture contrast between the tender cake and rich frosting. The apple cider flavor will shine through with every bite!
Pro Tips For Making Apple Cider Layer Cake
- Bake at 325°F: I learned this the hard way—350°F makes the outside burn before the middle sets. Apple cider cakes need gentle heat to let the moisture distribute evenly. Yes, it takes longer, but you’ll avoid that gummy center that ruins everything.
- Reduce cider first: Skip the raw cider and simmer it for 3-4 minutes until slightly thickened. This prevents a dense, wet crumb—your cake will rise properly and stay tender without turning soggy. (Trust me, I’ve made the mess.)
- Don’t overmix the batter: Once you fold in the dry ingredients, mix just until combined—about 10 strokes max. Overmixing develops gluten, which makes the cake tough. I used to beat it like I was kneading dough, and the result was a brick, not layers.
- Use room-temp butter: Cold butter creates pockets of air that don’t melt evenly, leading to uneven baking. Let it sit out for 30-45 minutes before creaming—your layers will be fluffier, and the texture won’t be greasy. (I know, I know, but it’s worth the wait.)
Make-ahead tips for this recipe
Prep Ahead Strategy
Bake the cake layers up to 3 days in advance—they keep beautifully in an airtight container at room temperature. Wrap each layer tightly in plastic wrap and store them stacked with parchment between layers. The flavors deepen over time, making this a perfect make-ahead dessert for busy schedules. 📅
Frosting Prep
Make the cream cheese frosting 1 day ahead and store it in the fridge. When ready to assemble, simply whip it with a hand mixer for 2-3 minutes to restore its fluffiness.
For extra insurance, cover it with a damp paper towel to prevent drying. This saves time on the day of serving and ensures a smooth finish.
Caramel Swirls
Store-bought caramel sauce can be pre-warmed in the microwave for 15-20 seconds to make it easier to pipe. Keep it in a small container in the fridge until ready to use.
For homemade caramel, prepare it 2 days ahead and store in an airtight container—it thickens slightly over time, so thin with a splash of apple cider if needed before using.
Assembly Timeline
Assemble the cake 4-6 hours before serving to allow the frosting to set properly. If you're short on time, assemble it 2 hours ahead and refrigerate—just let it sit at room temperature for 30 minutes before slicing. The cake holds its shape well, making it ideal for last-minute gatherings. ✨
Freezing Tips
For long-term storage, freeze the fully assembled cake (unfrosted) for up to 3 months. Thaw overnight in the fridge, then frost and decorate as directed. If you've already frosted it, freeze the cake in slices wrapped individually in plastic.
Reheat slices in the microwave for 10-15 seconds to restore that fresh-baked warmth.
Serving Prep
Garnish with candied apple slices or a sprinkle of cinnamon just before serving to keep decorations fresh. If you're serving warm slices, preheat the oven to 300°F and warm the cake for 10 minutes before adding ice cream. This simple step transforms the cake into a comforting, restaurant-worthy dessert. 🍎
Nutrition facts
Frequently asked questions
Can I substitute apple cider with another liquid?
Yes, but adjust the flavor! For 1.5 cups apple cider, use 1.5 cups unsweetened apple juice plus 1 teaspoon extra cinnamon or 1 cup orange juice for a citrus twist. Avoid water—it makes the cake dense. The cider's natural sweetness and spice are key to that signature flavor.
Why does my cake turn out dry?
Overbaking or overmixing are the usual culprits. Bake until a toothpick comes out clean (25-30 minutes at 350°F), not until the top looks fully set. For extra moisture, brush warm layers with 2 tablespoons apple cider before frosting. Wrapping cooled layers in plastic also helps retain moisture.
How do I make this cake gluten-free?
Replace the 3.5 cups all-purpose flour with a 1:1 gluten-free baking flour blend (like Bob's Red Mill). Add 1 teaspoon xanthan gum to improve texture. Reduce baking powder to 1.5 teaspoons and bake 5-10 minutes longer—gluten-free cakes need extra time to set.
Can I make this cake in a different pan size?
Yes, but adjust baking time. For 9-inch pans, reduce batter by 1/3 and bake 20-25 minutes. For 6-inch pans, use 1/2 the batter and bake 30-35 minutes. Always check doneness with a toothpick—smaller pans need more time to cook through.
What's the best way to store leftovers?
Wrap the whole cake tightly in plastic wrap and store at room temperature for 3 days. For longer storage, freeze slices wrapped individually for up to 3 months. Reheat frozen slices for 10-15 seconds in the microwave to restore freshness. The frosting stays stable when refrigerated!