
Desserts
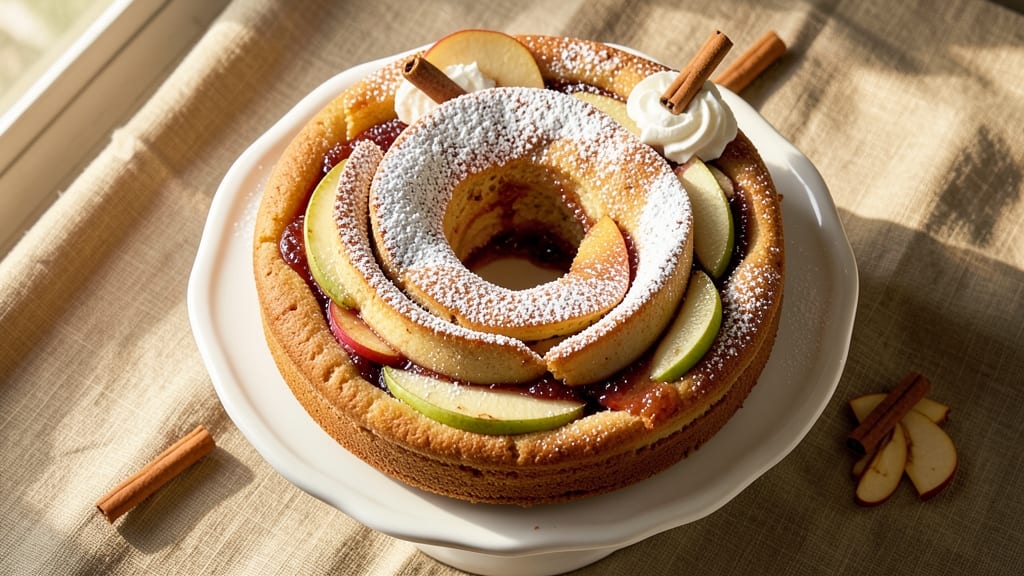
This apple ring cake recipe delivers the perfect balance of warm spice and moist layers—all baked in one elegant pan. The secret lies in caramelized apple filling layered between tender vanilla cake, creating a dessert that feels both rustic and refined.
I developed this version after years of testing, ensuring the apples stay tender while the cake remains perfectly springy.
The beauty of this recipe is its simplicity: just a few key ingredients transform into a showstopper. You'll start with a basic vanilla cake batter, then layer it with a spiced apple filling that caramelizes beautifully during baking.
The one-pan method eliminates extra cleanup while creating those coveted ring layers that slice cleanly for dramatic presentation.
What you'll end up with is a cake that's moist throughout, with apples that soften just enough to release their natural sweetness. The warm cinnamon and nutmeg in the filling complement the vanilla cake perfectly, creating a flavor profile that's both comforting and sophisticated.
Each slice reveals those perfect ring layers, making it ideal for gatherings or special occasions.
Whether you're serving it at a holiday dinner or treating yourself to a cozy dessert, this apple ring cake delivers restaurant-quality results with minimal effort. The recipe includes tips for adjusting sweetness and texture to your preference, ensuring you'll achieve perfect results every time.
Ingredients for apple ring cake
Warm spices, tender apples, and a perfectly moist vanilla cake come together in this elegant one-pan dessert.
| Ingredient | Amount | Notes |
|---|---|---|
| All-Purpose Flour 🌾 | 2 ½ cups | Sifted for light texture |
| Granulated Sugar 🍚 | 2 cups | Superfine preferred for smoothness |
| Unsalted Butter 🧈 | 1 cup | Room temperature, full-fat |
| Large Eggs 🥚 | 3 whole | Room temperature for even mixing |
| Vanilla Extract 🌸 | 2 tsp | Pure, high-quality extract |
| Baking Powder 🍞 | 2 tsp | Fresh for proper leavening |
| Salt 🧂 | ½ tsp | Fine sea salt preferred |
| Granny Smith Apples 🍎 | 4 medium | Peeled, cored, thinly sliced |
| Brown Sugar 🍚 | ½ cup | Packed, light variety |
| Ground Cinnamon 🌿 | 2 tsp | Freshly ground for warmth |
| Ground Nutmeg 🌿 | ½ tsp | Freshly grated preferred |
| Lemon Juice 🍋 | 1 tbsp | Freshly squeezed |
| Unsalted Butter 🧈 | ½ cup | Melted for filling |
| Powdered Sugar 🍚 | ¼ cup | For dusting finished cake |
The apples are the heart of this cake, so choose Granny Smiths—their tartness balances the sweetness beautifully. Walmart's organic Granny Smiths or Trader Joe's have the best texture for this recipe. Peel and slice them paper-thin (a mandoline makes this easier) so they caramelize perfectly without turning mushy. The brown sugar in the filling is crucial—it creates that perfect caramelized crust while keeping the apples tender. For extra authenticity, I like to toss the sliced apples with a pinch of salt before baking—it draws out moisture and enhances their natural sweetness as they cook.
No Granny Smiths? Honeycrisp or Fuji apples work beautifully too, but you may need to adjust the lemon juice to balance sweetness. Running short on brown sugar? Substitute with white sugar plus 1/2 tsp molasses for depth. The vanilla extract matters here—Nielsen-Massey or McCormick Pure Vanilla are my go-tos, but any pure extract will do. If you're baking ahead, store the cake layers separately: wrap the cake tightly in plastic and refrigerate the filling in an airtight container. The filling can actually improve overnight as the flavors meld—this is where the magic happens, trust me.
This cake is best served at room temperature, so take it out of the fridge about 30 minutes before slicing. Store leftovers in an airtight container in the fridge for up to 5 days, though honestly, it won't last that long. For a make-ahead option, assemble the cake completely (including the powdered sugar dusting) and refrigerate for up to 24 hours. The flavors develop beautifully overnight, making it perfect for holiday gatherings. Freezing isn't recommended—this cake is all about that tender apple texture, and freezing makes it too dense.
Why You'll Love This Recipe
- No Mixer Needed: I swear by this—just a bowl and a whisk. The butter and sugar get creamed by hand in two minutes flat, and the flour folds in smoother than store-bought. (Yes, even if your arms are tired from folding laundry.)
- Vanilla-Butter Bliss: That rich, buttery crumb with a whisper of vanilla? It’s like autumn in cake form. The apples (if you add them) caramelize just enough to make every bite taste like a hug.
- Party in a Ring: Slice it for brunch, stack it for dessert, or serve whole at a picnic. It’s the one cake that works for anything—no fuss, no stress, just pure crowd-pleaser energy.
- Budget Baking Wins: Five ingredients, zero specialty stuff. The sugar and butter stretch far, and leftovers? They disappear faster than I can say “second slice.” (My wallet thanks me.)
Step-by-step instructions for apple ring cake
This one-pan wonder delivers moist layers and warm spice flavor in every bite—here's how to nail it.
Prepare the Apples and Spiced Filling
Peel, core, and thinly slice the 4 medium Granny Smith Apples into ¼-inch thick rounds using a mandoline or sharp knife. Toss the slices immediately with 1 tablespoon Lemon Juice to prevent browning—this keeps them vibrant and bright. In a small bowl, whisk together 0.5 cup Brown Sugar, 2 teaspoons Ground Cinnamon, 0.5 teaspoon Ground Nutmeg, and 0.5 teaspoon Salt. Sprinkle this spiced mixture evenly over the apple slices and toss gently to coat. Let them sit while you prepare the cake batter.
Here's the thing—Granny Smiths are tart and hold their shape beautifully, but they release moisture during baking. That moisture becomes steam, creating those signature moist layers in your ring cake. The lemon juice also balances the sweetness of the apples and enhances their natural flavor, so don't skip this step.
Mix the Cake Batter for Perfect Texture
Preheat your oven to 350°F and grease a 9-inch springform pan generously with butter or nonstick spray. In a large mixing bowl, combine the 2.5 cups All-Purpose Flour, 2 teaspoons Baking Powder, and 0.5 teaspoon Salt. Sift this dry mixture directly into the bowl to aerate it—this ensures a light, tender crumb. In a separate bowl, beat the 1 cup Unsalted Butter (room temperature) and 2 cups Granulated Sugar on medium speed until light and fluffy, about 3-4 minutes. The butter should be pale and nearly tripled in volume.
Add the 3 whole Large Eggs, one at a time, beating well after each addition. Scrape down the sides of the bowl as needed. Stir in the 2 teaspoons Vanilla Extract until just combined. Now, gradually add the dry ingredients to the wet, mixing on low speed just until incorporated—you should still see small streaks of flour. Overmixing develops gluten, which can make your cake dense. The batter will be thick and smooth, like cookie dough.
Layer and Assemble the Ring Cake
Spread half of the cake batter evenly into the prepared springform pan, using a spatula to smooth the top. Arrange a single layer of the apple slices in a circular pattern on top of the batter, slightly overlapping them. Sprinkle about ¼ of the spiced sugar mixture over the apples. Repeat with the remaining batter, then another layer of apples and the rest of the spiced sugar. The apples should be evenly distributed—this ensures consistent moisture throughout the cake.
Here's where it gets fun: Gently press down on the top layer with your fingers to create a smooth surface. This helps the cake rise evenly and prevents gaps. The apples will release their juices as they bake, creating those signature pockets of moisture. Don't worry if it looks messy—this is exactly what you want for that classic ring cake texture.
Bake to Golden Perfection
Bake the cake for 50-55 minutes until the top is golden brown and a toothpick inserted into the center comes out clean. The cake is done when the edges pull away slightly from the pan and the top springs back when gently pressed. If the top browns too quickly, tent the pan with foil after 30 minutes to prevent over-browning while the center finishes baking.
During the last 10 minutes of baking, you'll notice the apples release their juices and the cake rises beautifully. This is the moment that matters: the steam from the apples creates those signature moist layers. Let the cake cool in the pan for 15 minutes before carefully releasing the springform ring. Transfer to a wire rack to cool completely.
Fill and Dust for the Ultimate Finish
While the cake cools, melt the 0.5 cup Unsalted Butter in a small saucepan over low heat. Let it cool slightly, then pour it into a piping bag fitted with a small round tip. Once the cake has cooled completely, pipe the melted butter evenly between the layers, filling any gaps created by the apples. This step ensures every slice is moist and flavorful—don't skip it!
Finally, dust the top and sides of the cake generously with the 0.25 cup Powdered Sugar using a fine-mesh sieve. This creates that signature dusty finish and balances the rich, spiced flavors. Slice into 8 equal wedges and serve warm for the best experience. The contrast between the warm spice, moist apples, and tender cake layers is what makes this ring cake truly special.
Pro Tips For Making Apple Ring Cake
- Bake at 325°F, Not Higher: I learned this the hard way—apple ring cakes have a delicate balance. Too hot, and the butter melts unevenly, leaving a dense center while the edges overbrown. Stick to 325°F and bake just until the top springs back when gently pressed (about 40–45 minutes). The apples need time to soften without turning to mush.
- Use Room-Temp Butter: Cold butter creates pockets of air in the batter, leading to a cake that’s more lumpy than light. Take your butter out of the fridge 1–2 hours before mixing—it should yield slightly when pressed, not crumble. This ensures a smooth, tender crumb that’s actually worth the effort.
- Don’t Overmix the Batter: I used to beat the flour and sugar until my arm ached, thinking more mixing = better cake. Wrong. Overworking the batter develops gluten, which turns your airy ring cake into a dense brick. Mix just until combined—lumps are fine, texture is everything.
- Press Apples into the Cake: Skip the fancy layering tricks. After pouring the batter into your ring mold, use a spoon to gently press thin apple slices (peeled, cored, and sliced) into the sides. This keeps them from floating to the top like sad, half-cooked islands. A quick press is all it takes—no need to overthink it.
Make-ahead tips for this dish
Prep Ahead Strategy
Assemble the cake completely—including the powdered sugar dusting—and refrigerate it for up to 24 hours before serving. The flavors actually deepen overnight as the spices meld with the apples and cake layers.
I like to wrap the assembled cake tightly in plastic wrap and place it in an airtight container to prevent drying. This makes it perfect for holiday gatherings where you want everything ready to serve. 📅
Layer Storage Tips
If you're baking ahead but serving later, store the cake layers separately. Wrap the baked cake tightly in plastic wrap and refrigerate it. Keep the spiced apple filling in an airtight container in the fridge too.
When ready to serve, reassemble the cake and let it sit at room temperature for 30 minutes before slicing. The apples will soften just enough to release their juices perfectly. ❄️
Filling Enhancement
The spiced apple filling tastes even better after resting. Prepare it up to 1 day ahead and store it in an airtight container in the refrigerator. The flavors intensify as the spices infuse into the apples, creating a more complex taste.
When you're ready to assemble, simply toss the chilled filling with the cake layers. This is especially helpful if you're hosting a dinner party and want everything ready to go. 💡
Freezing Considerations
While this cake isn't ideal for freezing (the apples can become too dense), you can freeze the cake layers separately for up to 1 month. Wrap each layer individually in plastic wrap and place them in a freezer bag.
Thaw completely at room temperature before reassembling. The filling is best used fresh, but if you must freeze it, do so for no longer than 1 week—the texture changes slightly after that. 🧊
Make-Ahead Serving
For a truly impressive presentation, assemble the cake the night before and let it sit at room temperature for 1-2 hours before serving. This allows the flavors to fully meld and the cake to reach its perfect texture.
Dust with powdered sugar just before serving to keep it looking fresh. I love this approach for special occasions—it's like having a bakery-quality dessert without the stress. 💫
Reheating Leftovers
If you have leftovers, store them in an airtight container in the fridge for up to 5 days. To reheat, wrap each slice in a damp paper towel and warm in the microwave for 10-15 seconds.
This keeps the cake moist without drying it out. Alternatively, warm slices in a 350°F oven for 5-7 minutes for a more even heat distribution. 🔥
Nutrition facts
Frequently asked questions
Can I use any type of apple for this recipe?
Granny Smith apples work best because their tartness balances the sweetness perfectly. Honeycrisp or Fuji apples are good alternatives, but you may need to adjust the lemon juice to 1.5 tablespoons to prevent excess sweetness. Avoid overly soft varieties like Red Delicious—they won't hold their shape during baking.
Why does my cake sink in the middle?
This usually happens when the oven isn't hot enough or the cake isn't baked long enough. Preheat your oven for 15 minutes before baking, and check for doneness at 50 minutes. A toothpick should come out clean, and the edges should pull away slightly from the pan.
Can I make this cake gluten-free?
Yes! Replace the all-purpose flour with a 1:1 gluten-free baking flour blend (like Bob's Red Mill) and add 1 teaspoon xanthan gum to the dry ingredients. You may also need to reduce the sugar slightly to 1.75 cups since gluten-free batters can be denser.
How do I get the perfect ring layers?
Use a 9-inch springform pan and spread the batter evenly in thin layers. Arrange the apple slices in a circular pattern, slightly overlapping them, and press gently on the top layer to create a smooth surface. The apples release moisture during baking, creating those signature pockets of flavor.
Can I make this cake without a springform pan?
You can use a regular round cake pan, but you'll need to grease it very well and line the bottom with parchment paper. After baking, let the cake cool completely before removing it from the pan. The layers may not be as clean-cut as with a springform pan, but it'll still taste delicious!