
Desserts
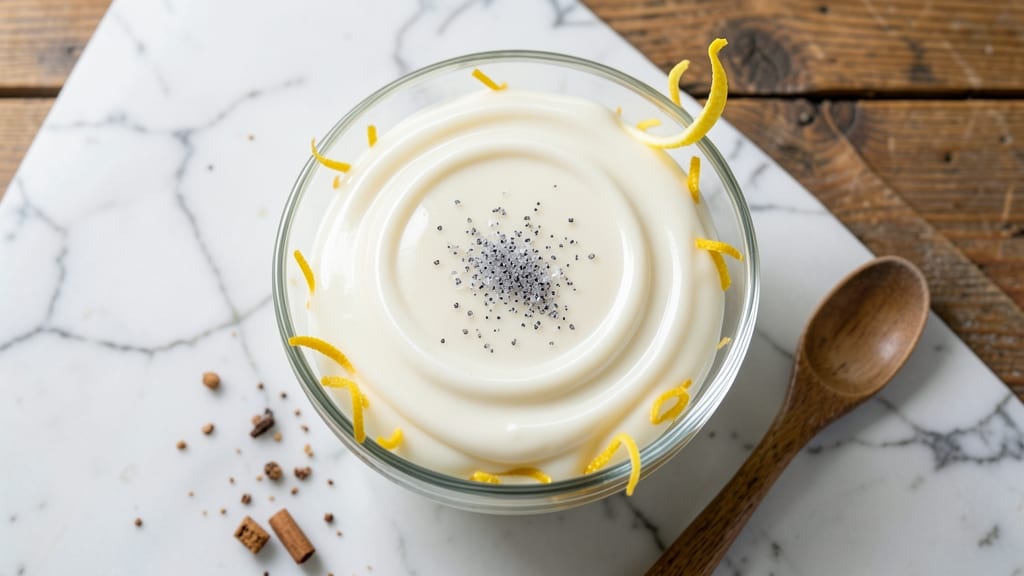
This angel food cake glaze icing recipe transforms your cake from simple to showstopping without adding weight or density. The secret lies in a delicate balance of powdered sugar, light citrus zest, and just enough liquid to create a silky, drizzable finish that enhances—rather than overpowers—the cake's signature airiness.
I perfected this recipe after years of testing, because even the lightest angel food cake deserves a glaze that feels as effortless as the cake itself.
The magic happens in the ratio: 3 cups powdered sugar to 2 tablespoons lemon juice (or another citrus), with just a pinch of salt to balance sweetness. This combination creates a glaze that's thick enough to cling beautifully to layers but light enough to avoid sogginess.
For extra elegance, I add a splash of vanilla extract or a hint of almond extract—subtle enough to complement rather than compete with the cake's natural flavor.
What you'll achieve is a cake that looks like it came from a bakery, with a smooth, glossy finish that catches the light just right. The glaze sets quickly but remains tender, so you can slice without worrying about crumbs or mess.
Whether you're serving it at a brunch or a special celebration, this glaze elevates the cake to restaurant-quality levels—without requiring any special equipment or techniques.
For variations, swap the lemon for orange or lime zest, or infuse the glaze with melted chocolate for a decadent twist. The key is always the same: keep the glaze light, keep it fast-setting, and keep it from overwhelming the cake's delicate structure.
Let's get started—your cake deserves this perfect finish.
Ingredients for angel food cake glaze icing
Eight essential ingredients create the perfect light-as-air glaze for angel food cake.
| Ingredient | Amount | Notes |
|---|---|---|
| Powdered Sugar 🍚 | 3 cups | Sifted for smooth texture |
| Fresh Lemon Juice 🍋 | 2 tbsp | From organic lemons preferred |
| Vanilla Extract 🌸 | 1 tsp | Pure vanilla extract recommended |
| Fine Sea Salt 🧂 | ¼ tsp | Diamond Crystal preferred |
| Lemon Zest 🍋 | 1 tsp | Fine zest from organic lemons |
| Light Corn Syrup 🍯 | 1 tbsp | Karo brand recommended |
| Almond Extract 🌰 | ¼ tsp | Optional for nutty depth |
| Unflavored Gelatin 🍬 | ½ tsp | Powdered, dissolved in 1 tbsp warm water |
The powdered sugar is the foundation here—Domino brand or any high-quality 10X works best. I always sift mine through a fine-mesh sieve to eliminate any lumps, which can ruin that silky texture. For the citrus, organic lemons from the grocery store's produce section give the brightest flavor. The zest should be fine and vibrant—no dried-out bits. If you're using store-bought lemon juice, grab the minimal-ingredient kind (just lemon juice and maybe a touch of citric acid) to avoid any weird additives that might alter the glaze's delicate balance.
No fresh lemons? Bottled lemon juice works in a pinch, but reduce to 1.5 tablespoons since it's more concentrated. Want to skip the gelatin? Extra 1 teaspoon of corn syrup adds just enough body to help the glaze set without weighing down the cake. The vanilla and almond extracts are optional but worth it for that bakery-quality depth—Goya or McCormick brands are reliable. For a chocolate twist, melt 1 ounce of dark chocolate with the corn syrup before mixing. Just be sure to let it cool completely before combining with the other ingredients to avoid curdling the glaze.
This glaze sets in about 10-15 minutes at room temperature, so work quickly if you're decorating right away. Store leftovers in an airtight container in the fridge for up to 3 days, though I've never had any last that long—it disappears faster than you can say 'angel food cake.' For extra shine, brush the glaze with a tiny bit of neutral oil (like grapeseed) before serving. The cake will stay moist for 2-3 days when stored properly, making this glaze perfect for make-ahead desserts.
Why You'll Love This Recipe
- Three-Ingredient Magic: Just powdered sugar, lemon juice, and a splash of vanilla—that’s it. No eggs, no butter, no fuss. I’ve made this glaze while chatting on the phone, and it still comes out silky smooth every time.
- Zesty Brightness: That fresh lemon juice and zest? It’s like sunshine in a bowl. The salt balances it perfectly, so you get this bright, tangy sweetness that makes angel food cake taste like a bakery secret instead of a box mix.
- Crowd-Pleaser Finishing: Drizzle it over cupcakes, layer it between cake tiers, or even spoon it over fruit. Honestly, I’ve used it for everything from birthday cakes to Sunday brunch desserts, and no one’s ever asked what’s in it—they just want more.
- No-Waste Wonder: Make a big batch—it keeps for days in the fridge. A little goes a long way, so you’ll have glaze left for last-minute treats, gifts for neighbors, or even a quick topping for pancakes. (Yes, even on a Tuesday night.)
Step-by-step instructions for angel food cake glaze icing
Here's how to create a silky, light-as-air glaze that perfectly complements your angel food cake.
Bloom the Gelatin for Stability
In a small bowl, sprinkle the 0.5 teaspoon unflavored gelatin evenly over 1 tablespoon warm water—never hot, as it will cook the gelatin instead of blooming it. Let it sit for 5 minutes until it becomes a jelly-like consistency. This step is crucial for giving your glaze that professional stability without making it too heavy.
While waiting, I like to sift the 3 cups powdered sugar into a medium mixing bowl. This removes any lumps and ensures your final glaze will be ultra-smooth. Sift directly over the bowl to avoid creating a cloud of sugar in your kitchen.
Combine Wet Ingredients for Flavor Balance
In a separate small bowl, whisk together the 2 tablespoons fresh lemon juice, 1 teaspoon vanilla extract, 0.25 teaspoon fine sea salt, 1 teaspoon lemon zest, 1 tablespoon light corn syrup, and 0.25 teaspoon almond extract (if using). The lemon juice and zest provide bright acidity, while the corn syrup adds subtle sweetness that prevents the glaze from being overly tart.
This mixture should be well combined and free of any zest strings. I always strain it through a fine-mesh sieve to ensure a completely smooth texture. The salt might seem like a small amount, but it enhances all the other flavors and prevents the glaze from tasting flat.
Incorporate Bloomed Gelatin and Sugar
Once your gelatin has bloomed, gently warm the bowl in a microwave-safe container for 10-15 seconds until it becomes completely liquid but not hot to the touch. Immediately whisk this into the sifted powdered sugar in your mixing bowl. The sugar will help dissolve the gelatin completely while preventing any graininess.
Add the lemon mixture to the sugar-gelatin combination and whisk vigorously for 1-2 minutes until completely smooth. The glaze should be thick but pourable—like heavy cream consistency. If it's too thick, add 1-2 teaspoons warm water at a time until you reach the perfect drizzling consistency. Too thin, and it will pool; too thick, and it won't flow beautifully.
Cool and Adjust for Perfect Decoration
Transfer the glaze to a clean glass jar or bowl and let it cool to room temperature for 20-30 minutes. This cooling period is essential—it allows the gelatin to fully set while maintaining that light, airy quality. The glaze should thicken slightly but remain smooth enough to drizzle.
Taste and adjust the flavor balance if needed. If it tastes too sweet, add a tiny pinch more salt. If it needs more brightness, add another ½ teaspoon lemon juice. Once perfect, transfer to a piping bag fitted with a small round tip or use a squeeze bottle for elegant drizzles. The glaze should flow like honey but set quickly on the cake's surface for that professional finish.
Pro Tips For Making Angel Food Cake Glaze Icing
- Sift the Sugar: Dump that powdered sugar straight into the bowl and you’re asking for lumps. Sift it through a fine-mesh sieve first—especially if your sugar’s been sitting in a damp cupboard—so the glaze stays silky smooth. I used to skip this and ended up scraping clumps off the cake like I was cleaning a kid’s face.
- Measure Lemon Juice: Don’t eyeball the lemon juice. Use a scale or a measuring spoon—this isn’t a guess-the-flavor game. Too little and the glaze tastes like vanilla frosting; too much and you’ve got a tart lemon face. Stick to the recipe’s ratio, then taste as you go.
- Whisk Until Shine: Stop stirring when the glaze looks thick—keep going until it’s glossy. That extra 30 seconds of whisking makes the difference between a dull, cake-stuck-to-your-fingers coating and one that drizzles like a pro. I learned this after a disastrous batch where the icing clung like glue.
- Salt Last, Taste Twice: Add the sea salt at the very end, right before tasting. Then taste again after mixing—salt enhances the lemon and vanilla, but too much too soon can throw off the balance. A pinch is enough; trust me, your cake won’t taste bland.
Essential equipment for this dish
Mixing Bowl Essentials
Start with a medium-sized stainless steel mixing bowl—I prefer 1.5-quart capacity from OXO Good Grips—because it gives you enough room to whisk without spills while keeping ingredients contained. The smooth surface prevents sugar from sticking, and the ergonomic handles make it easy to hold steady while mixing vigorously.
Avoid glass bowls for this step, as sugar can scratch the surface over time. 🍚
Precision Measuring Tools
For this glaze, accuracy matters—especially with the powdered sugar and gelatin. Invest in a digital kitchen scale (I use OXO Good Grips) for the sugar to ensure you hit 3 cups exactly (which equals about 360 grams).
For the gelatin and extracts, a small measuring spoon set (like Weston or KitchenAid) ensures you don’t over- or under-measure. A fine-mesh sieve (I recommend OXO Good Grips) is non-negotiable for sifting the sugar and zest.
Gelatin Bloom Tools
The gelatin bloom is where stability begins, so use a small microwave-safe bowl (I like Pyrex) for the warm water step. A whisk (preferably silicon-coated like OXO) helps dissolve the gelatin evenly without creating lumps.
For timing, a 10-second microwave interval is critical—use a timer on your phone or a dedicated kitchen timer (like Hamilton Beach) to avoid over-heating the gelatin.
Straining and Storing
Strain the zest and lemon mixture through a fine-mesh sieve (or cheesecloth) into your mixing bowl to remove any strings or pulp. For storage, transfer the finished glaze to an airtight glass jar (I use Le Parfait)—glass preserves flavor better than plastic and won’t absorb odors.Label it with the date, as this glaze keeps for 3 days in the fridge. A small offset spatula (like OXO) helps scrape every last drop from the bowl for no waste. ✨
Drizzling Tools
For that bakery-worthy finish, use a piping bag with a small round tip (I love Ateco 806) or a squeeze bottle (like OXO Good Grips) for controlled drizzles. If you’re feeling fancy, a pastry brush (I use Silpat) lets you paint the glaze in delicate strokes.
Avoid metal utensils—they can leave streaks or react with the citrus acids over time.
Optional: Chocolate Twist
If you’re making the chocolate variation, melt the 1 ounce dark chocolate in a double boiler (or microwave in 20-second bursts) using a heat-safe bowl (like Ceramica). Stir with a spatula to avoid splatters, then let it cool completely before mixing into the glaze.
A thermometer (I use Thermoworks) helps ensure the chocolate reaches 110°F—not too hot, or it’ll seize when combined with the sugar. 🍫
Nutrition facts
Frequently asked questions
Can I make this glaze without gelatin?
Yes, but with adjustments! Replace the gelatin with an extra 1 teaspoon corn syrup and 1 teaspoon water to help the glaze set slightly. For extra stability, chill the glaze for 30 minutes before using. The texture will be slightly softer but still workable for drizzling.
How do I fix a glaze that's too runny?
If your glaze is too thin, whisk in an extra ½ cup powdered sugar at a time until it thickens to a honey-like consistency. Avoid adding more gelatin—it can make the texture grainy. For a quick fix, chill the glaze for 10 minutes before re-testing.
Can I use this glaze on other cakes?
This light glaze works beautifully on pound cake, sponge cake, or even cupcakes. For denser cakes like carrot or chocolate, reduce the lemon juice to 1 tablespoon to prevent sogginess. The key is always to let the cake cool completely before applying the glaze.
Why does my glaze taste flat?
Flat flavor usually means the salt or acid balance is off. Add a pinch more sea salt or ½ teaspoon lemon juice to brighten it. For depth, stir in ¼ teaspoon vanilla bean paste or a splash of orange liqueur (like Cointreau). Always taste as you go!
How do I get clean drizzle lines?
Use a piping bag with a small round tip or a squeeze bottle for precision. Hold the bag at a 45-degree angle and squeeze slowly for even lines. For extra control, chill the glaze for 15 minutes before drizzling—it'll set faster and stay put.